In the previous guide we covered how to initially setup the lazer client and how to appropriately add the necessary sources for it in OBS. In this guide I will show you how to control these scenes and how to personalise them with videos and images.
All the assets that the client uses are placed according to the following directory structure:
📂tournaments
┣ 📂default
┃ ┗ 📂flags
┃ ┃ ┗ your flags here
┃ ┣ 📂mods
┃ ┃ ┣ DT.png
┃ ┃ ┣ FM.png
┃ ┃ ┣ HD.png
┃ ┃ ┣ HR.png
┃ ┃ ┣ NM.png
┃ ┃ ┗ TB.png
┃ ┣ 📂videos
┃ ┃ ┣ gameplay.mp4
┃ ┃ ┣ ladder.mp4
┃ ┃ ┣ main.mp4
┃ ┃ ┣ mappool.mp4
┃ ┃ ┣ schedule.mp4
┃ ┃ ┣ seeding.mp4
┃ ┃ ┣ showcase.mp4
┃ ┃ ┣ teamintro.mp4
┃ ┃ ┣ teamwin-blue.mp4
┗ ┗ ┗ teamwin-red.mp4
The images in the mods folder are used across the different scenes that display maps, like the Mappool scene and the Seeding scene. If you wish to create your own graphics, the dimensions that I recommend if you wish to create your own graphics is 180x100 for rectangles and 150x150 for squares and circles.
I will go through all of the screens one by one and also specify which video file it needs as its background. Feel free to use CTRL+F on this webpage if you're looking for the purpose of a specific file.
Schedule
The Schedule scene will display the matches that have recently happened and any planned matches in the future that have a specific date and time set in the Bracket Editor. It also displays the match that is coming up next with a countdown.
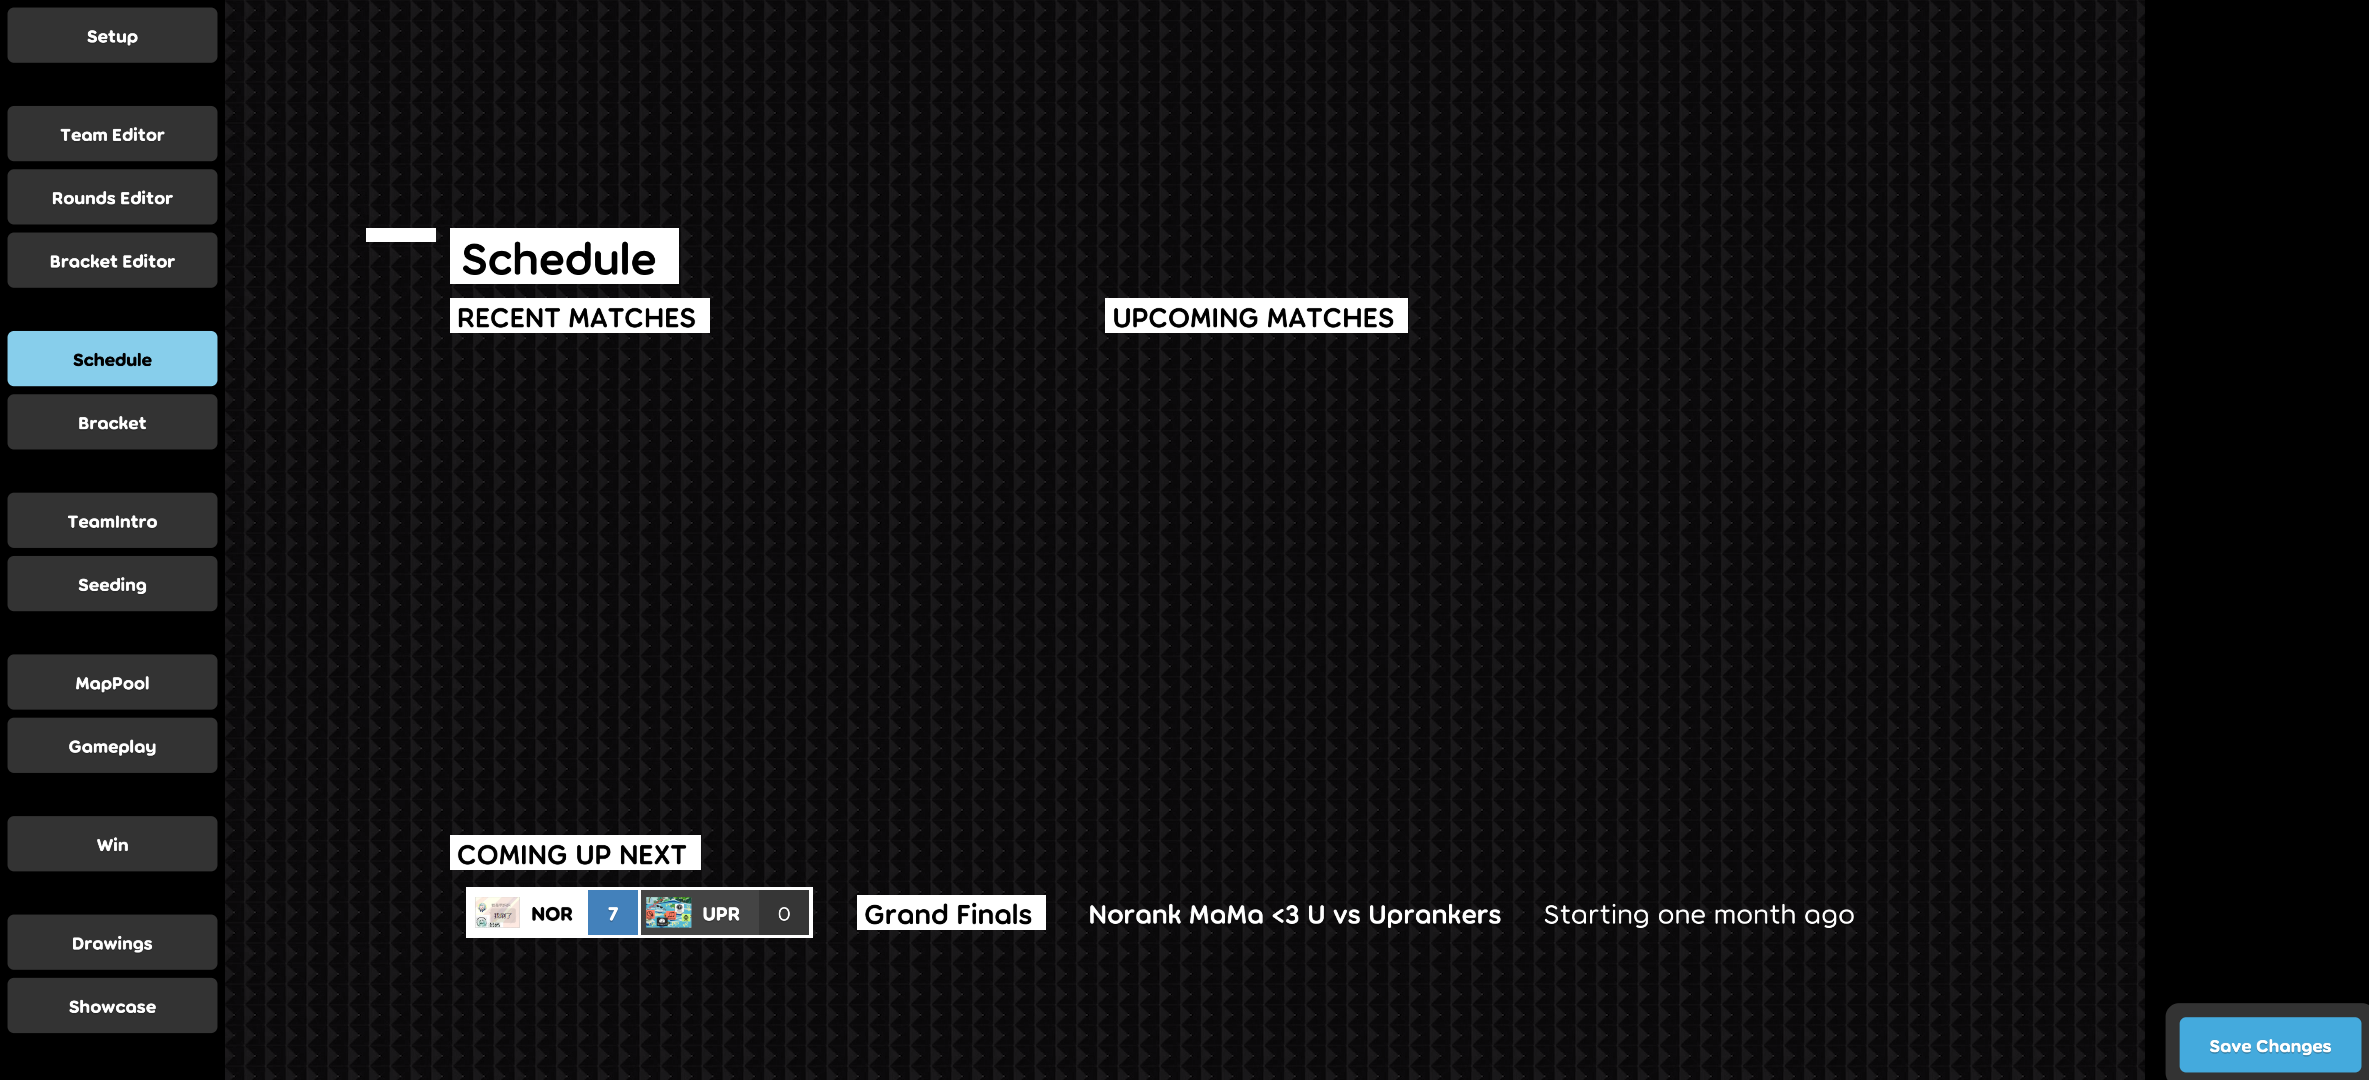
This scene uses schedule.mp4 as its background video.
TeamIntro
The TeamIntro scene displays the information about the match that is about to be played. It shows the current stage and the two teams facing off against each other. It also shows the flags for both teams. One column of players in this screen can fill up to 5 players and consecutive columns will be made for more players if necessary.
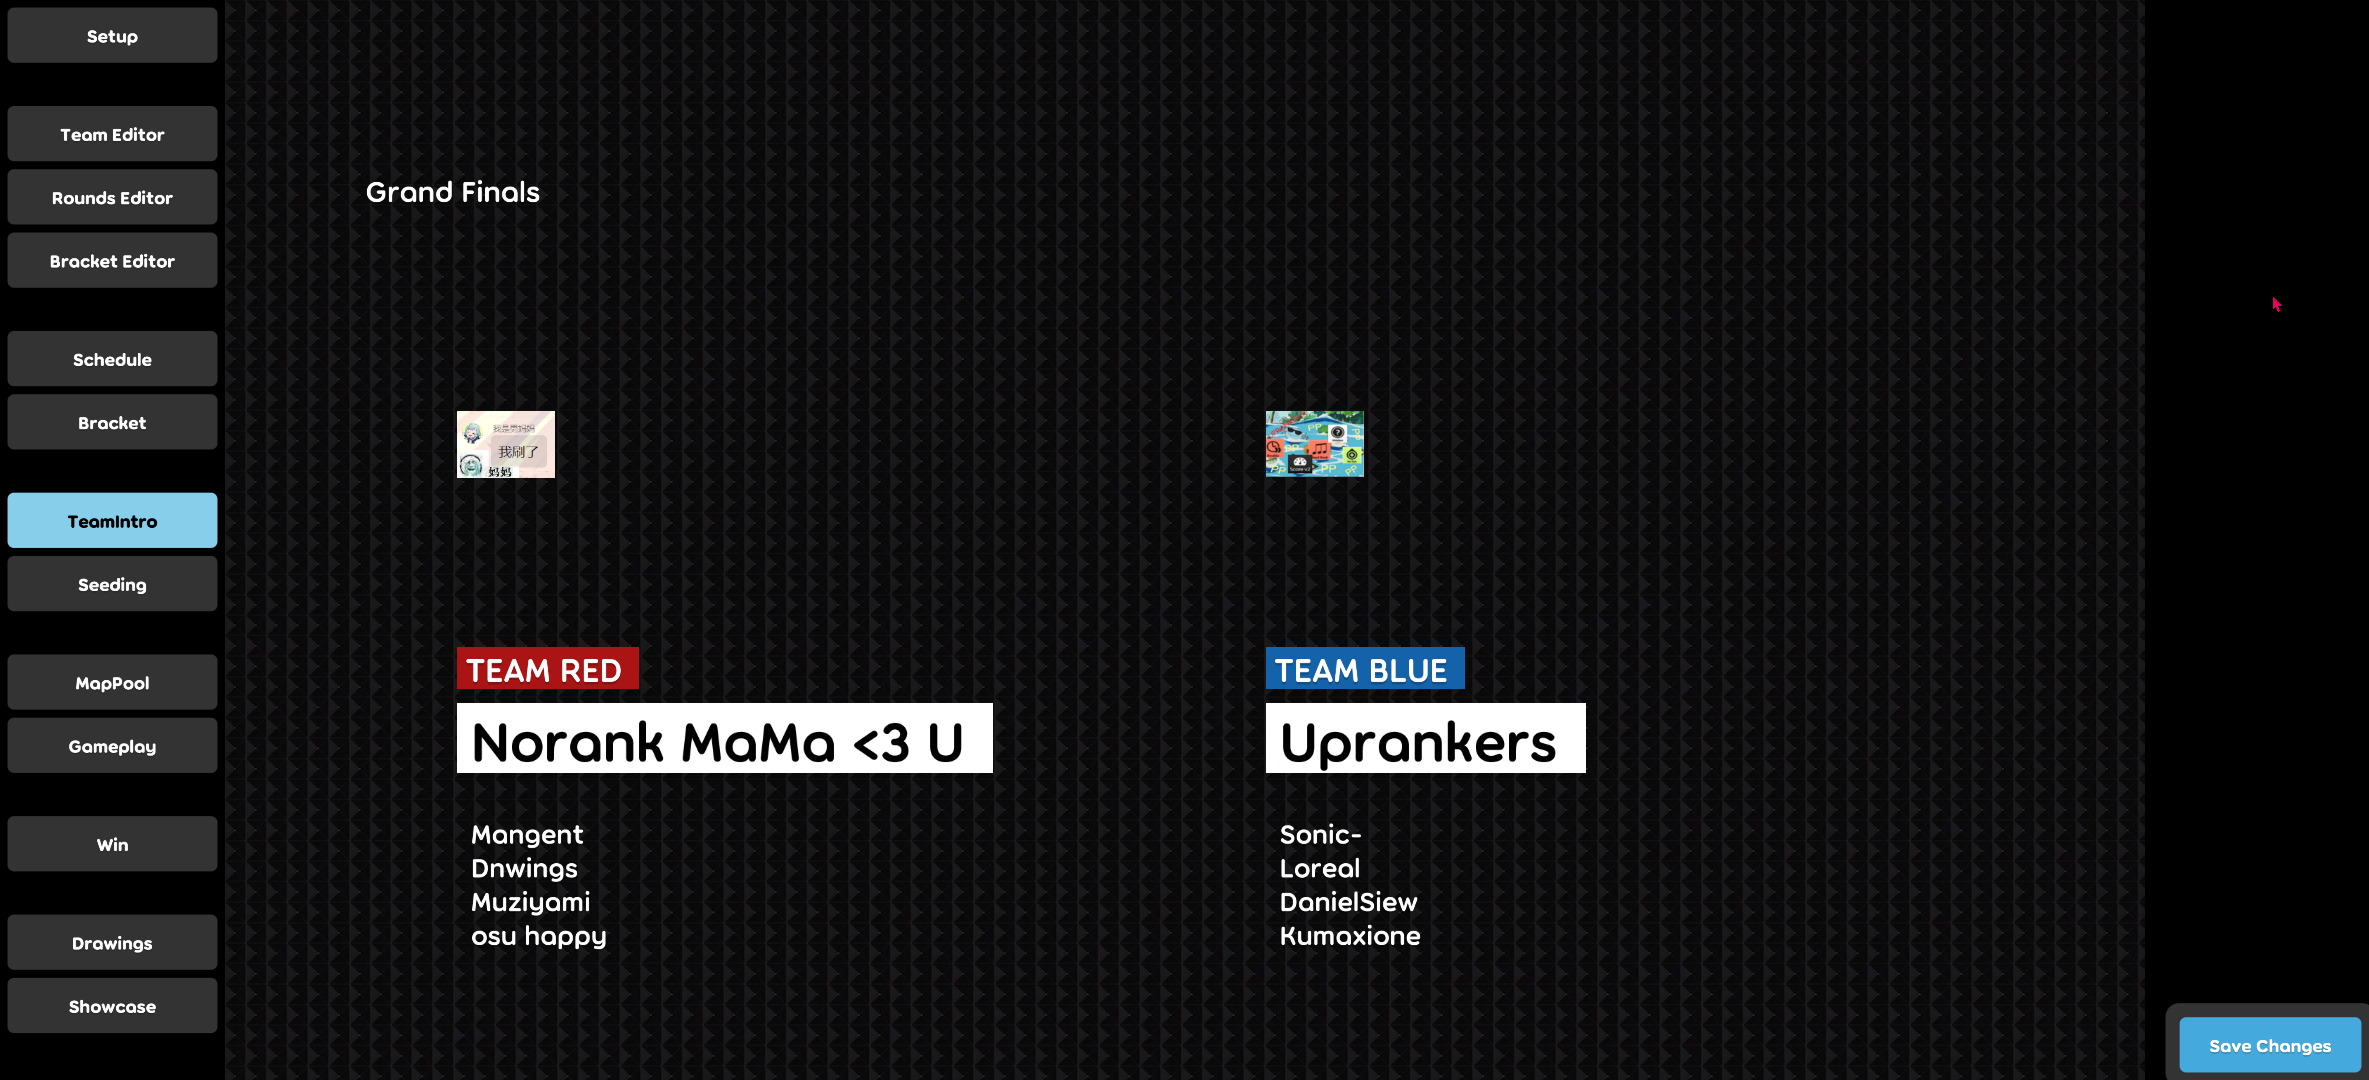
This scene uses teamintro.mp4 as its background video.
Seeding
The seeding scene displays one team and the information about the players and their ranks. You can use this screen to display the the results of the seeding and their placing in the last iteration of the tournament.
The seeding information can be edited in the Team Editor. I will go more in-depth about entering this information and more in the next guide.
Controls
In the control panel, on the right side the streamer can switch between the two teams of the current match, so the viewers can get context on the team that the commentators are talking about. There is also a dropdown menu to select a specific team that is not participating in the same match.
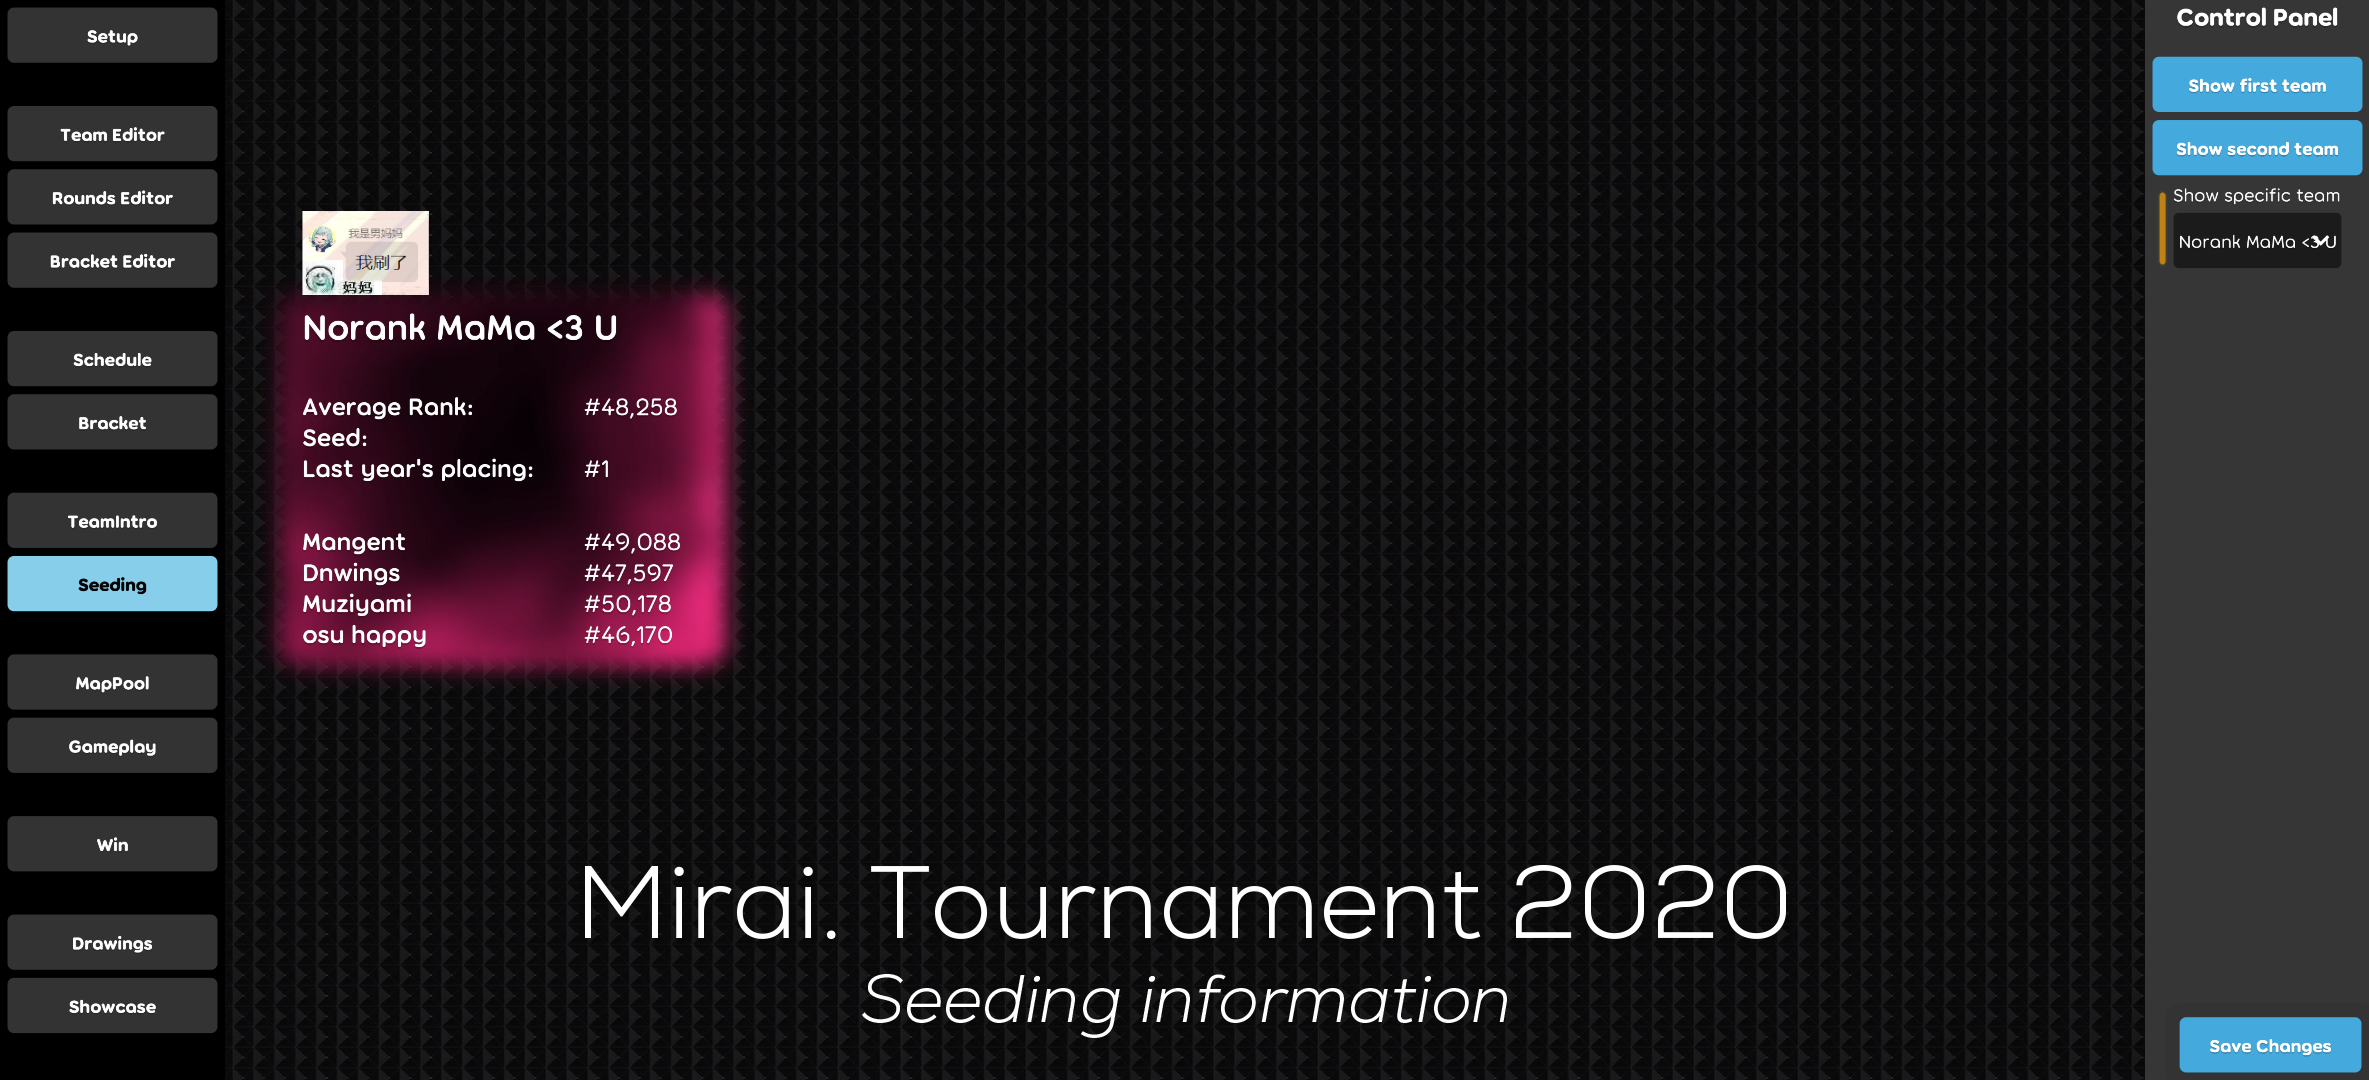
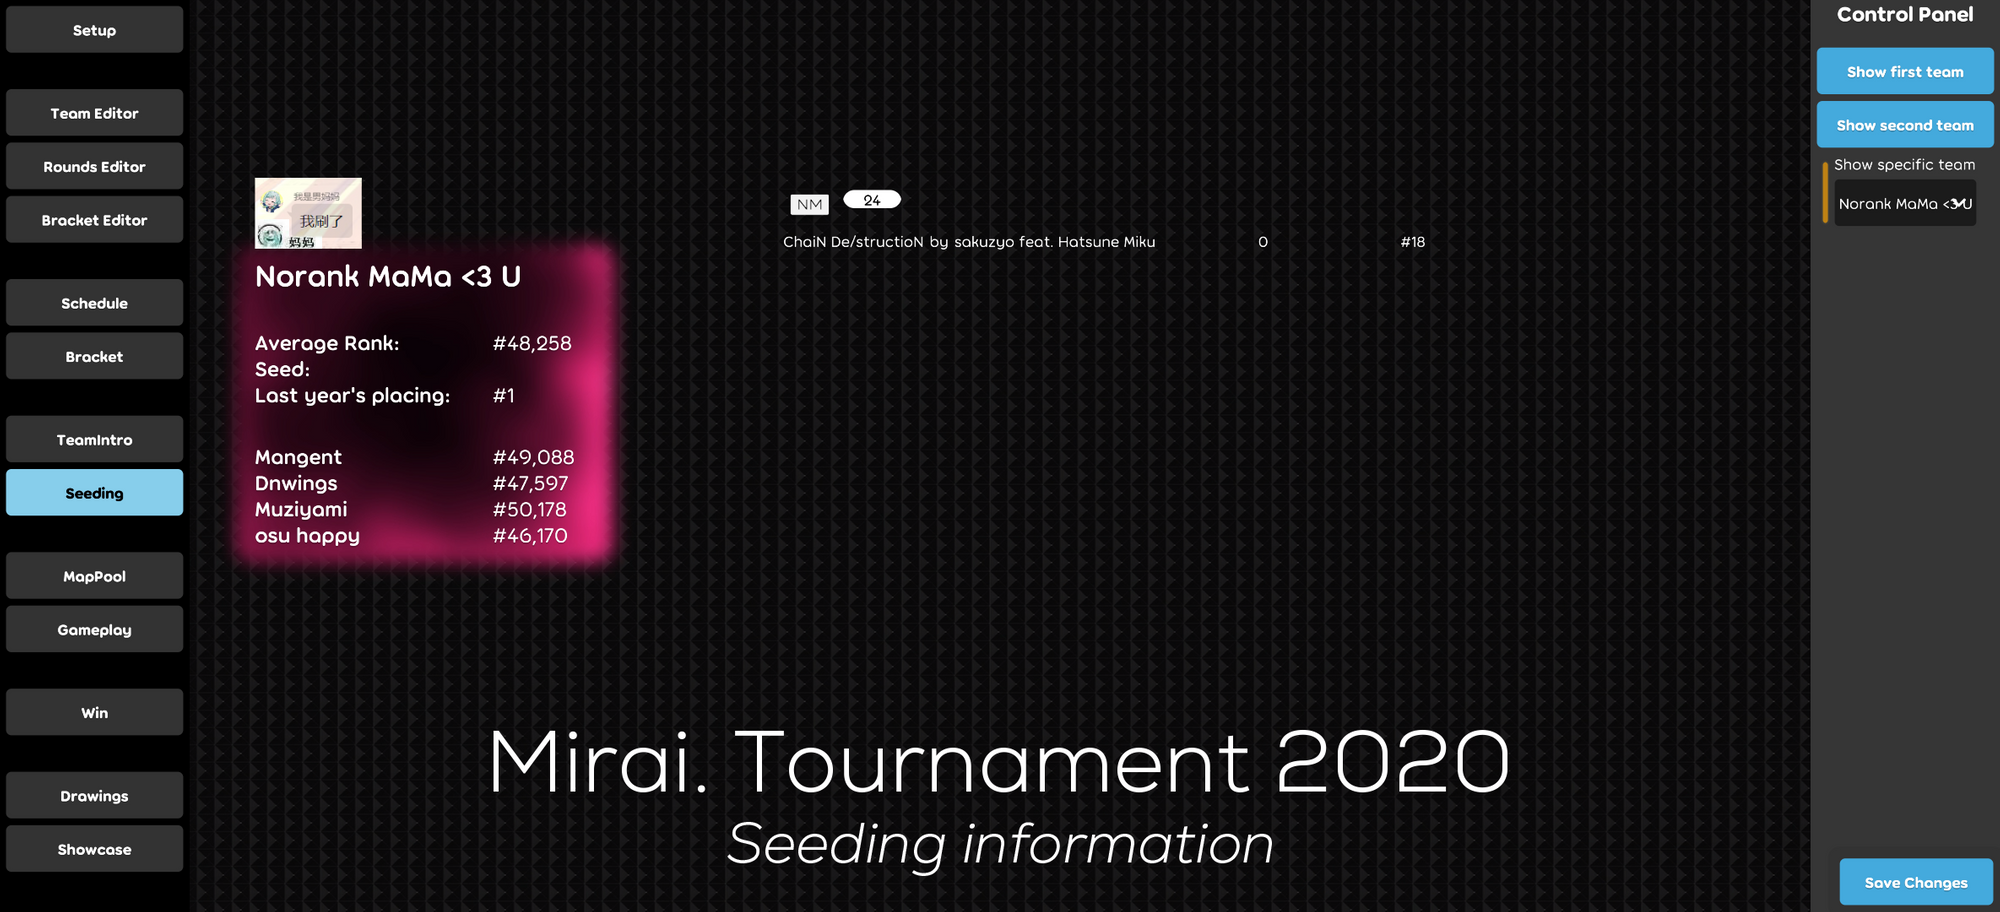
The seeding scene uses seeding.mp4 as its background video.
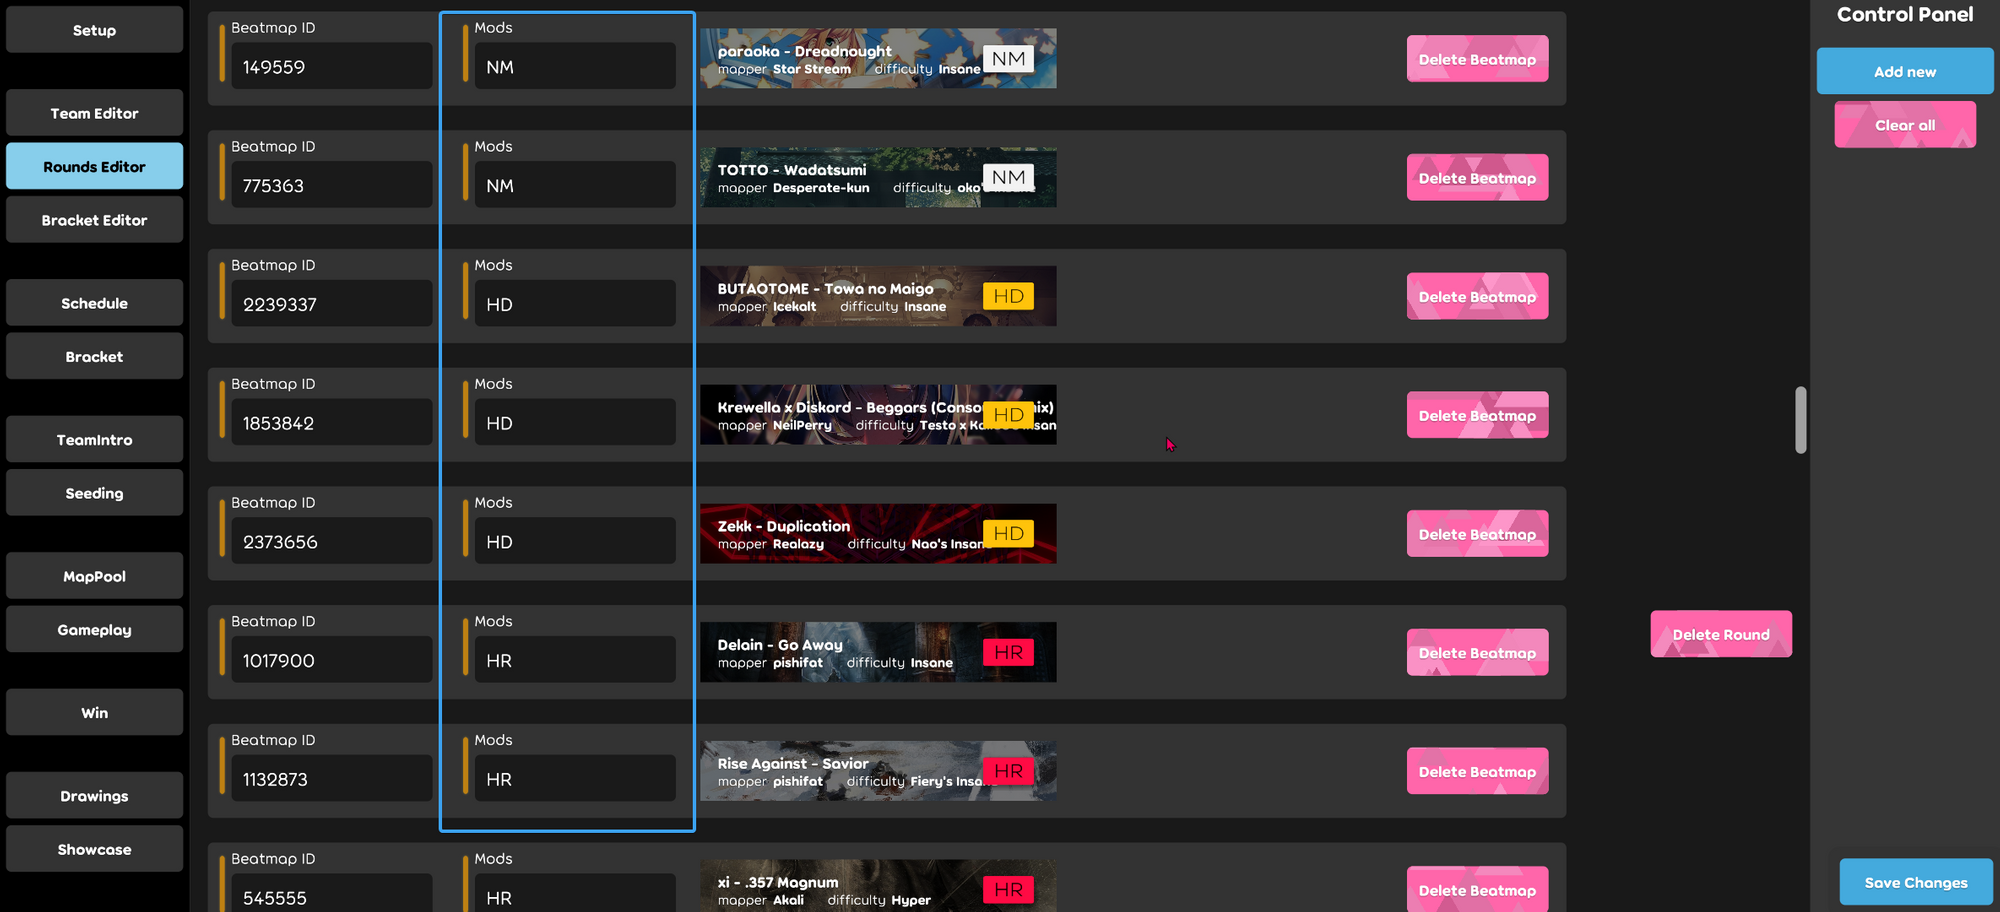
Mappool
The mappool screen takes the data you entered from the Rounds Editor and displays on screen for the viewers.
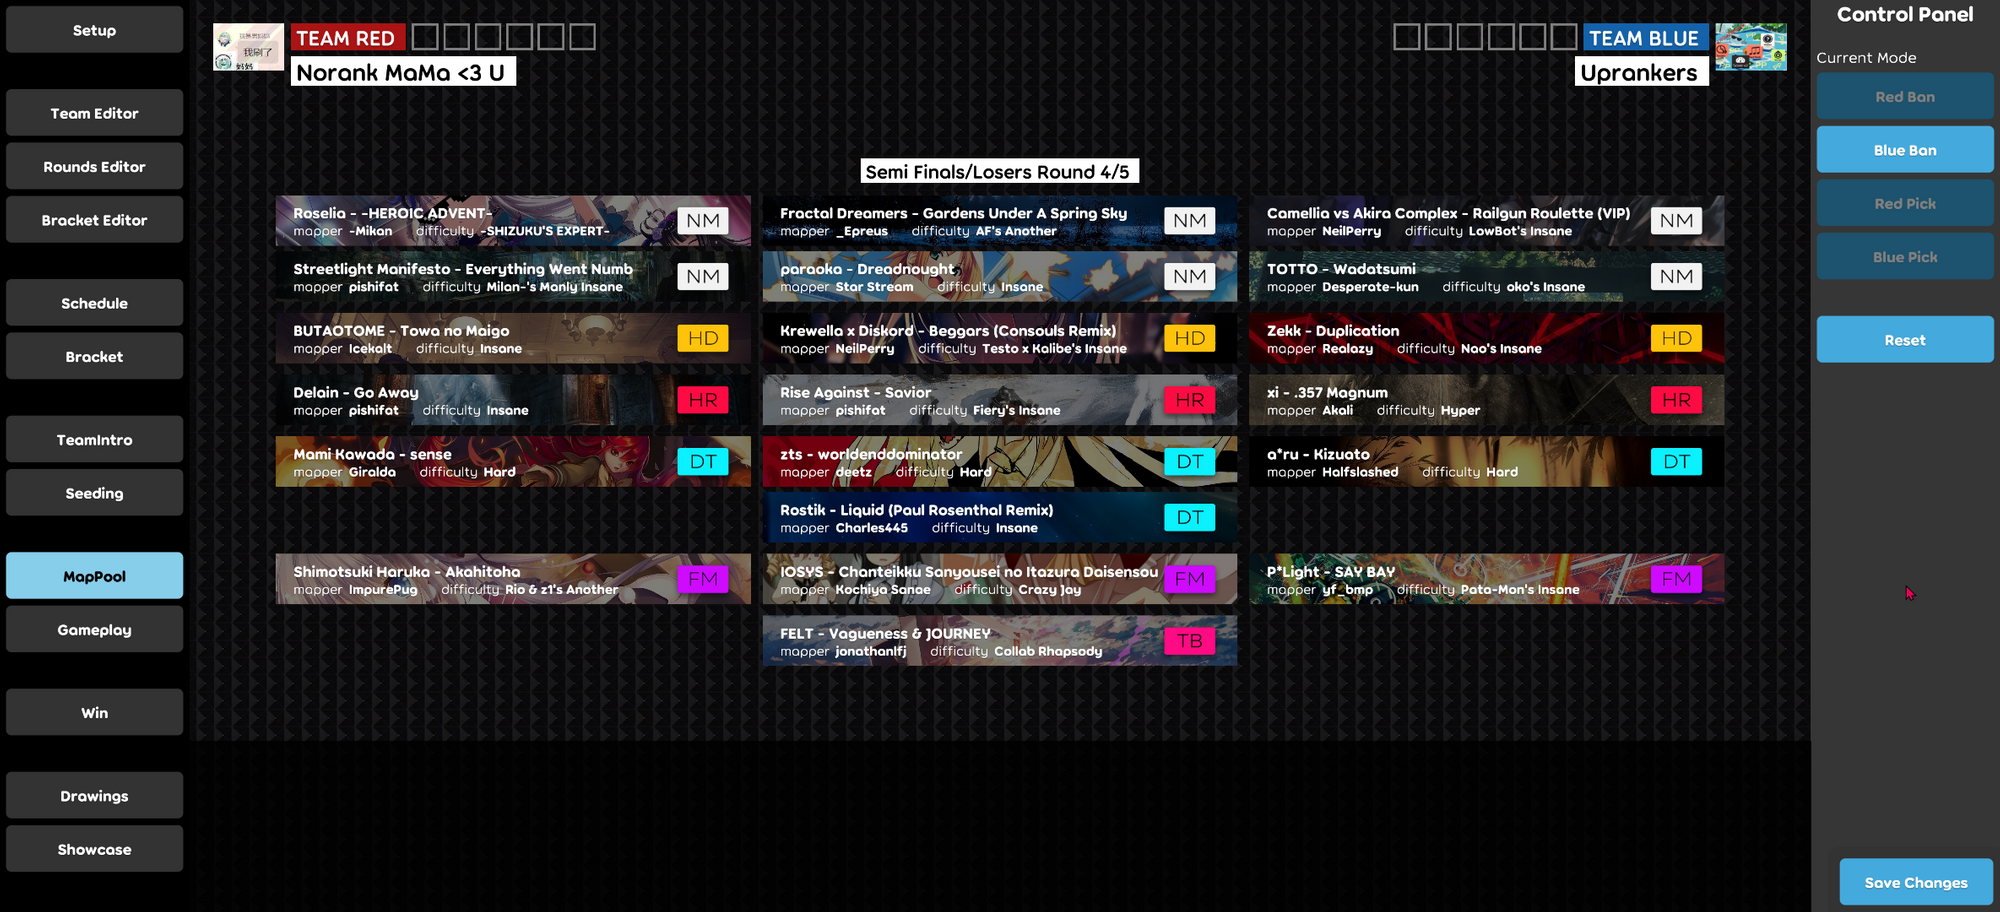
On this screen, the streamer can control the pick and ban phase. The former is usually to be manually input, because beatmap changes executed by the referee are automatically marked as picks. However, in the event that there are server issues or an exceptional situation happens during a match, the streamer can override this behaviour. These actions are only visual changes and will not affect the lobby.
Controls
The controls on the Mappool screen are pretty straightforward:
- Left click on a beatmap tile: execute the selected action in the control panel.
- Right click on a beatmap tile: remove the marking.
The control panel can be used to control the action you want to execute. It's recommended to select an action in the control panel before you click on the tiles, because the default flow is Red pick -> Blue ban -> Red ban -> Red pick -> Blue pick etc.
Graphics
The Mappool screen makes use of the images provided in the `mods` folder to mark the mod type used on a specified beatmap. The mods you define in the client should match the filenames of the images you're providing in the folder.
The Mappool screen uses mappool.mp4 as its background.
Gameplay
The gameplay screen is where the spectating of the match takes place. If you followed the previous guide, then the green section is keyed out and replaced by the gameplay windows in your streaming program.
In the top centre, the text for the current round and the logo (if added) is displayed. Then on each side the team names, their scores and flag are displayed. In the bottom the chat and song info are displayed when a map is not being played.
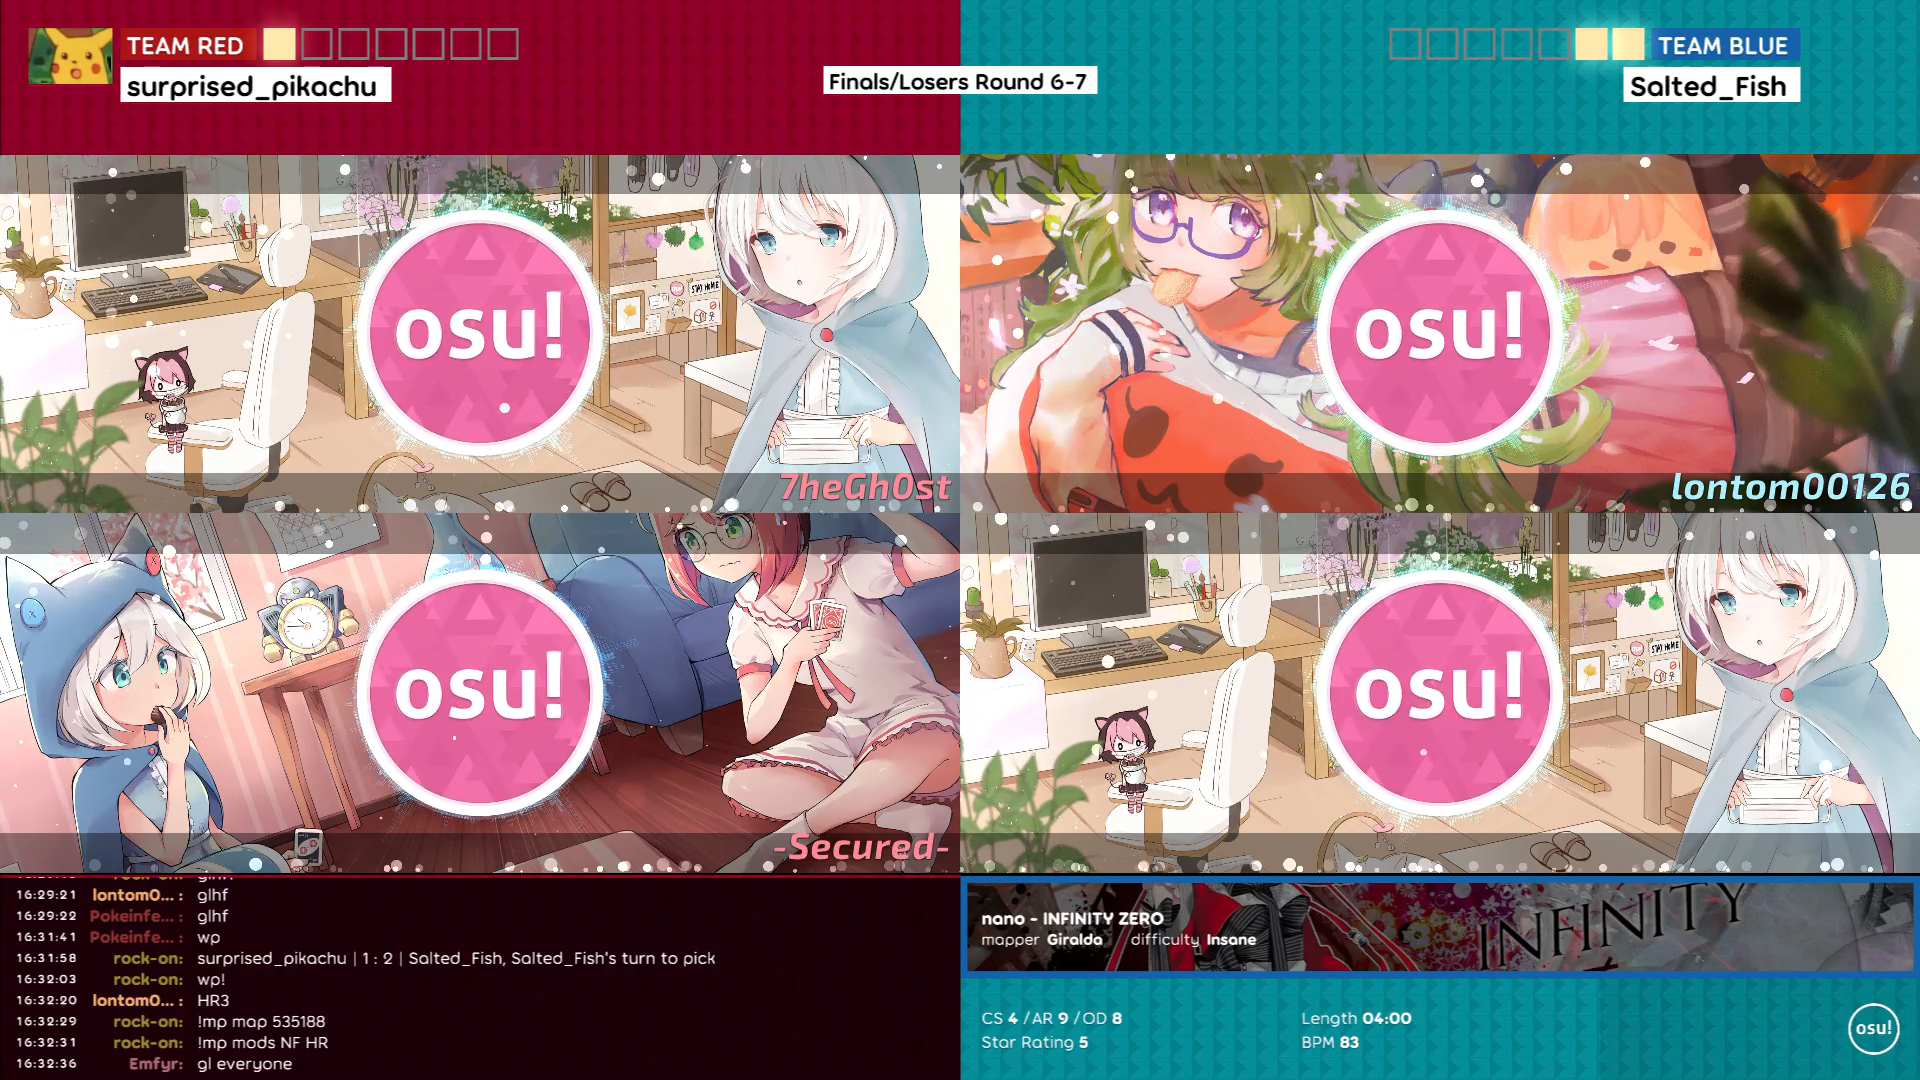
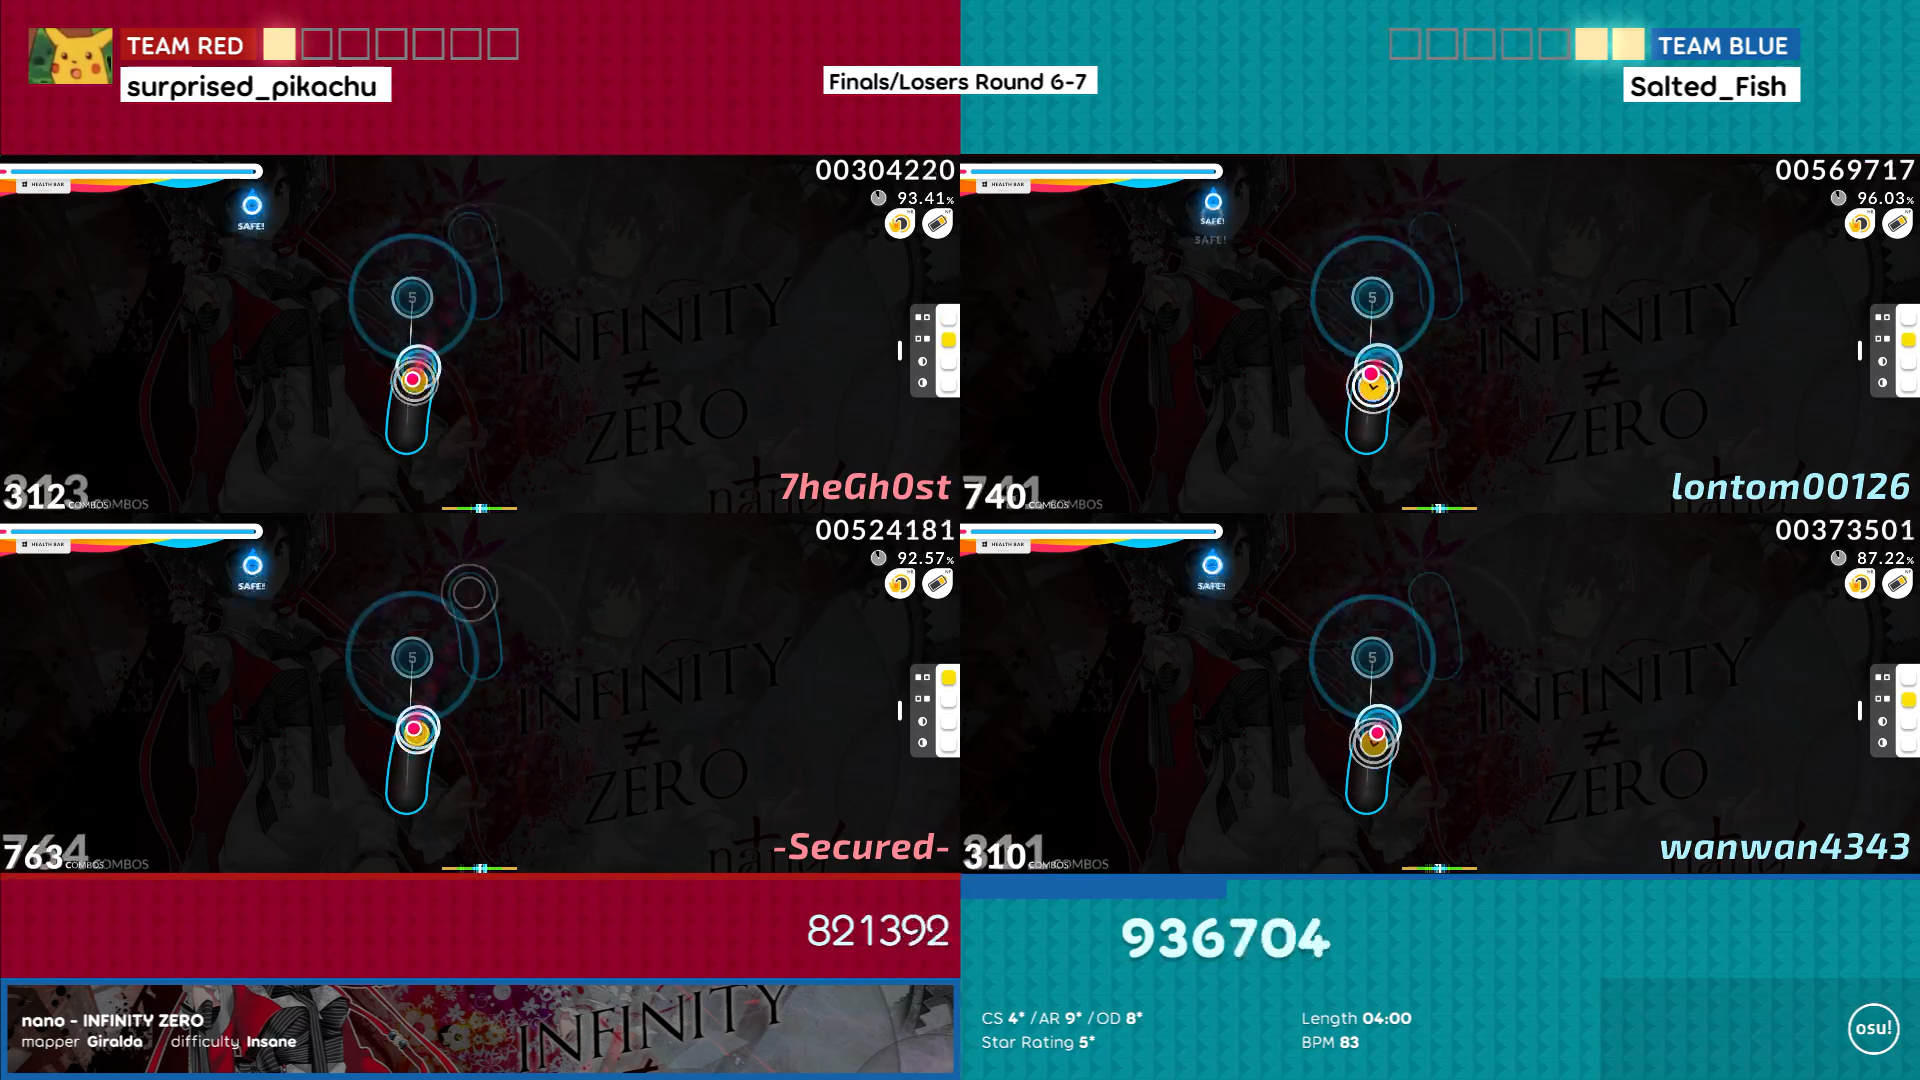
When a map is being played the bottom side of the screen changes to display the score and the information about the current map.
Controls
On the right side there are the following controls:
- Toggle warmup: This toggles the visibility of the score counter of the teams and toggles the automatic score incrementing.
- Toggle chat: This is needed if the chat doesn't automatically show up after a round. Clicking this button in any other case causes the chat window visibility to be toggled.
- Chroma width: You can adjust the width of the green area that gets keyed out in OBS. It's recommended to keep this at the highest value.
- Players per team: You can adjust the players per team between 3 and 4 here. For a 1v1 or 2v2 match you'd want to keep this on 4. For a 3v3 you'd want this on 3.
Graphics
An important difference between osu!lazer and Stable is that the positions of the Red Team and Blue Team are flipped. In the original Stable and Cutting Edge clients Blue Team is on the left and Red Team is on the right.
If you prefer being consistent, it's recommended to inform any referees and graphic designers about this so they can adjust for it.
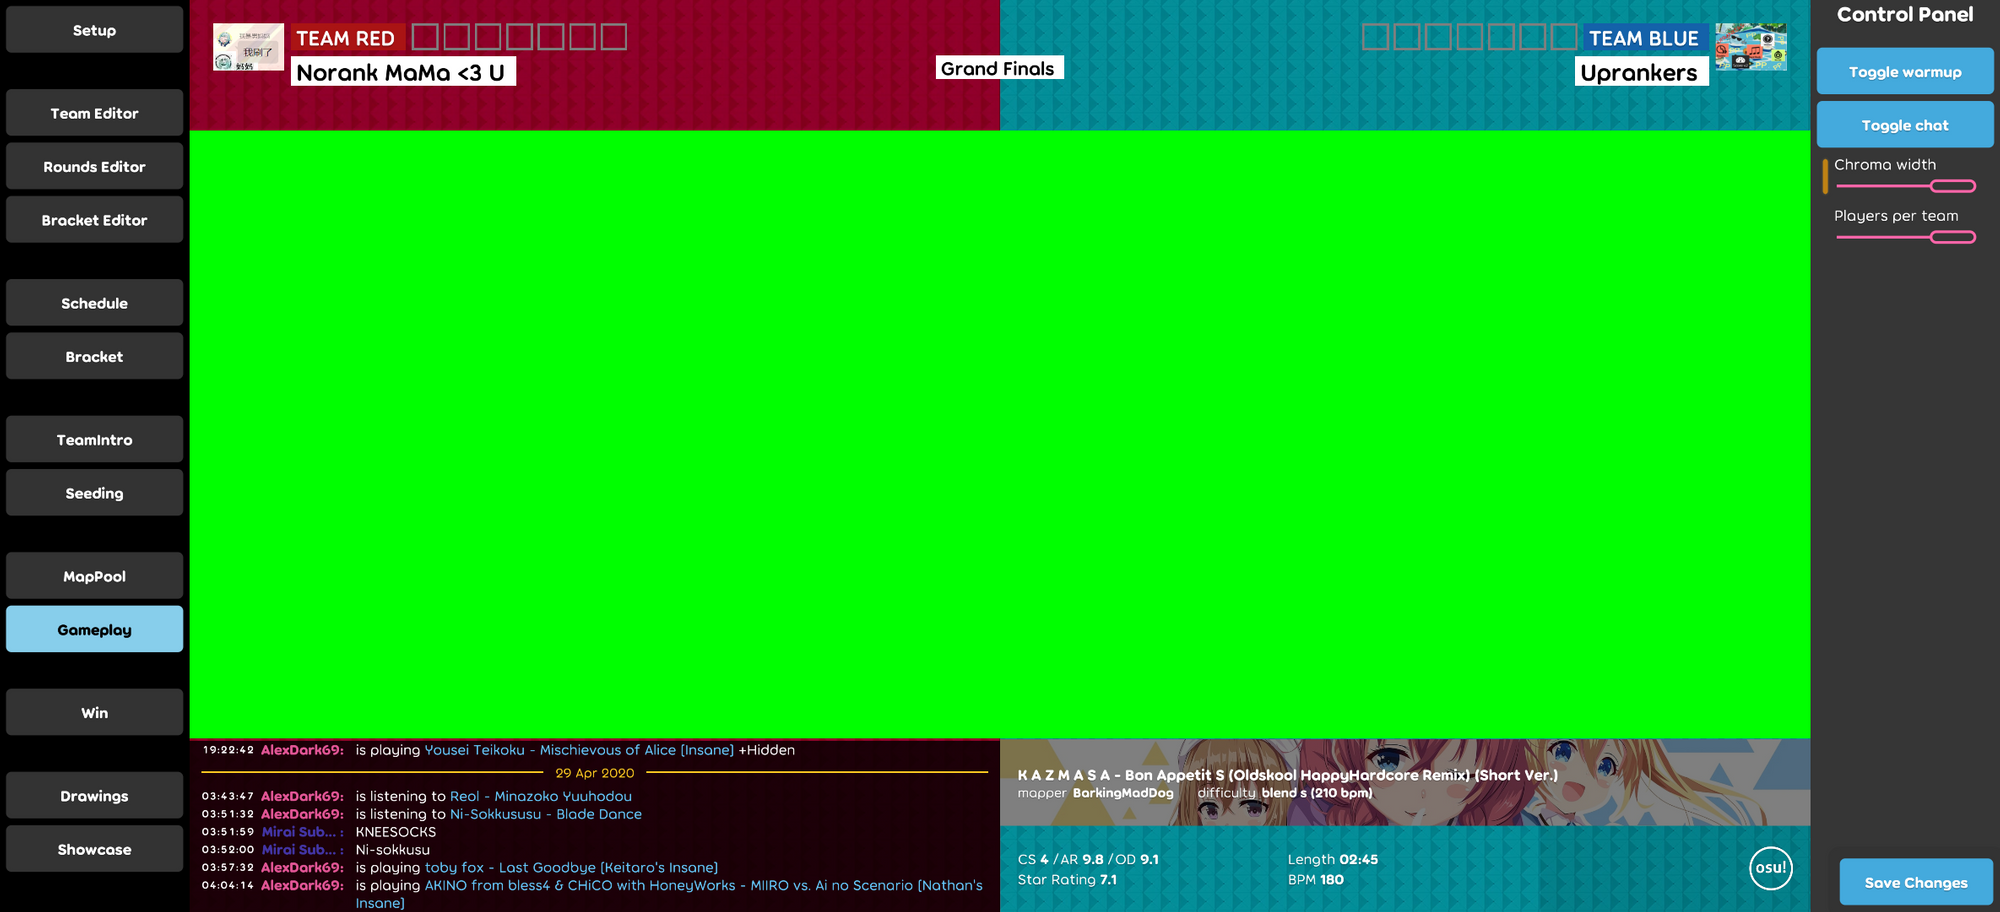
The Gameplay screen uses gameplay.mp4 as its background.
Win
The Win scene is where the winner of the most recent match is displayed. It will automatically show after a delay when a team wins the match. It is also manually triggerable by left clicking on the score count in the gameplay scene until the maximum is reached.
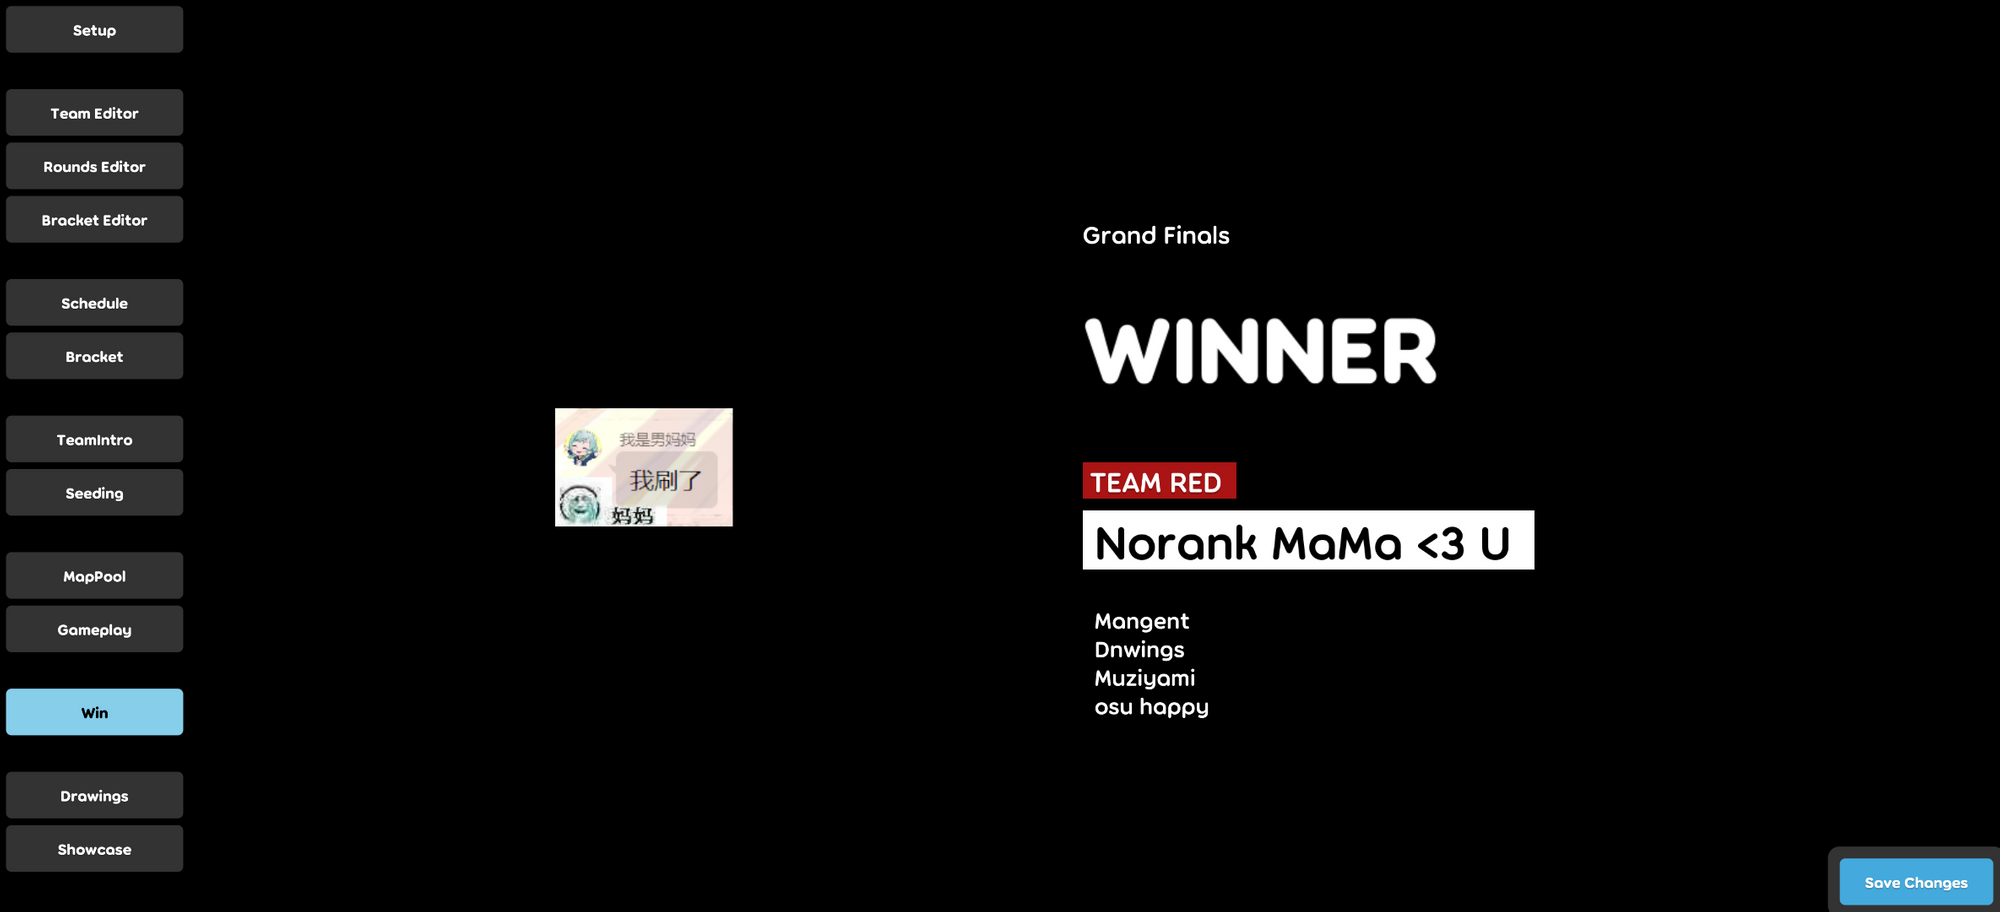
Graphics
The Win scene uses teamwin-blue.mp4 and teamwin-red.mp4 depending on which team wins. As different files are used for the two possible winners, it’s possible to make backgrounds specific to the winning team.
Showcase
The Showcase scene is used for mappool showcases. Most of the scene here will be chroma keyed, with only the bottom right corner showing for the background video.
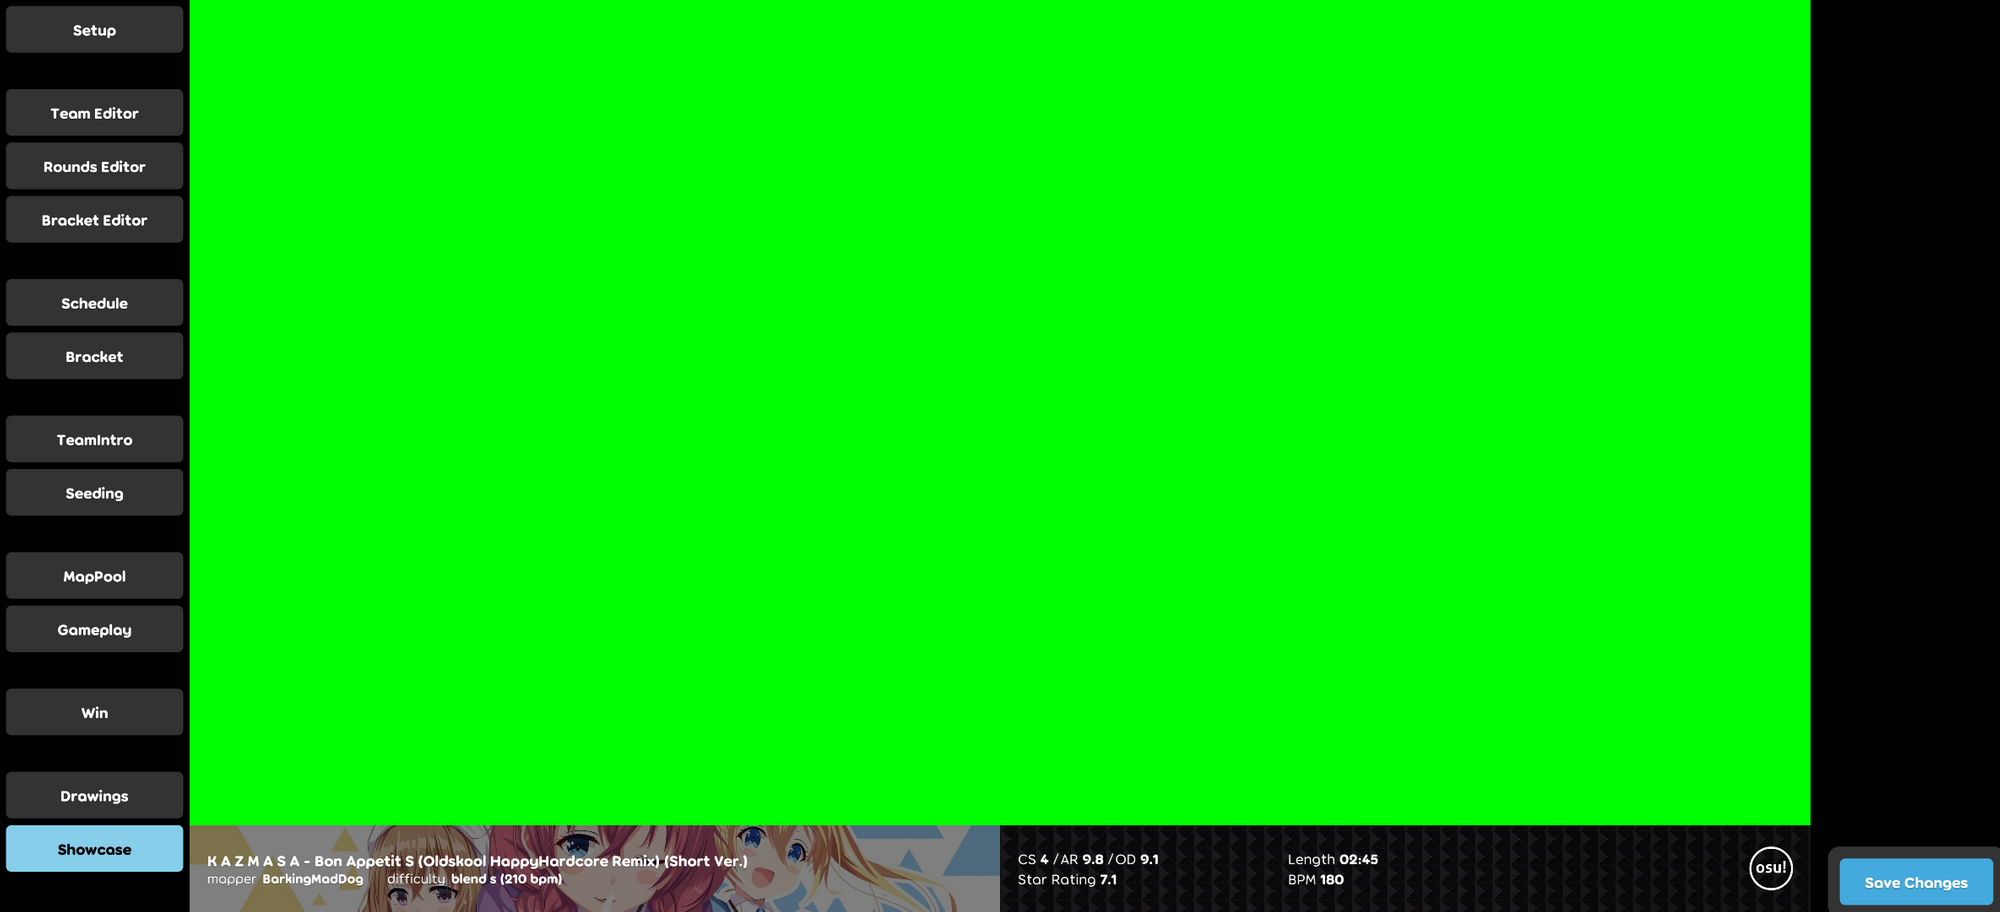
To make optimal use of this scene, you need to manually set the resolution of osu!stable to 1920x980 1920x978 or a different resolution that conforms to the 96:49 320:163 aspect ratio. This makes the client perfectly fit inside the chroma keyed area. You can achieve this by opening your osu!.<username>.cfg file and editing the lines for Width and Height appropriately.
For the song info to show correctly you will need to use osu! in the Cutting Edge release branch.
In the next guide I will cover the Editor screens and you will learn about adding teams, rounds and how the bracket works in osu!lazer.
You can follow the osu!lazer project here on GitHub: https://github.com/ppy/osu
Follow me on Twitter: https://twitter.com/MiraiSubject
Feel free to shoot me a tweet if you have any questions!